

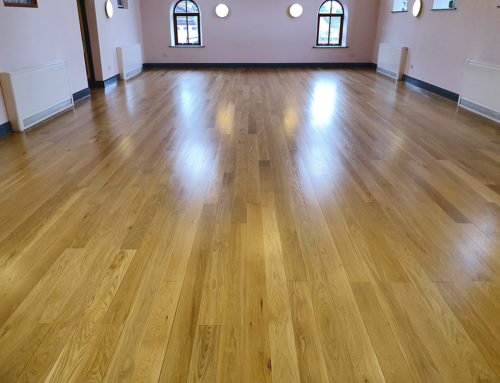
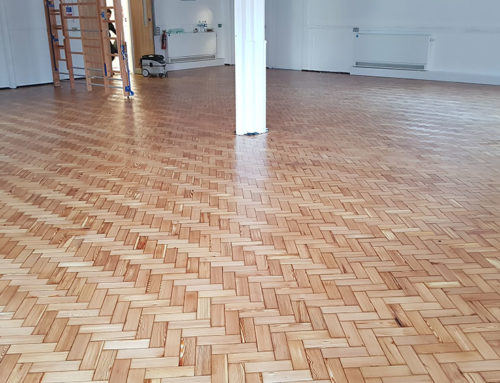
For any floor sanding project, preparation is so important. We are often taught the lesson that preparation is key. This really is the case with wood floor sanding. It is the start of the process to creating wonderful wood floors. When does the preparation start? Well, this depends on whether you are attempting DIY floor sanding or employing a professional to help with the wood floor restoration process.
For any DIY project the preparation should realistically start when you are contemplating the project. For any profession, the preparation begins from the point at which we survey your wood floor. This process offers great insight for many reasons. It allows our clients to get to know us and what they can expect from the sanding process. Some clients like to take the opportunity to ask as many questions as they may have. We are happy to discuss all aspects of the restoration process, and this is where our passion for what we do becomes clear.
Floor Sanding Project – Getting a Great Start
Preparation is key for this. We will inspect the entire wood floor to make sure that nails are well below the wood surface. While this is being completed, we can also identify if there are any loose boards. These boards need to be fixed otherwise further damage can be caused during the sanding process. Loose boards can easily be dislodged as the sanding machinery passes over them.
If there are any gaps between the boards, these also need to be sorted. There are different ways in which these can be dealt with. This may depend on how large the gap is. Another important preparatory process is applying a protective covering to all surrounding areas. This offers protection against skirting boards and other areas of our client’s homes.
Light scratches and dull areas do not generally need specific repairs as these are sanded away during the restoration process. If you would like to find out more about our floor restoration services, please get in touch by calling 0800 852 7188.


